Write a Tildagon OS app
This guide will help you build a "Hello, World" app for the Tildagon badge.
Hello World app
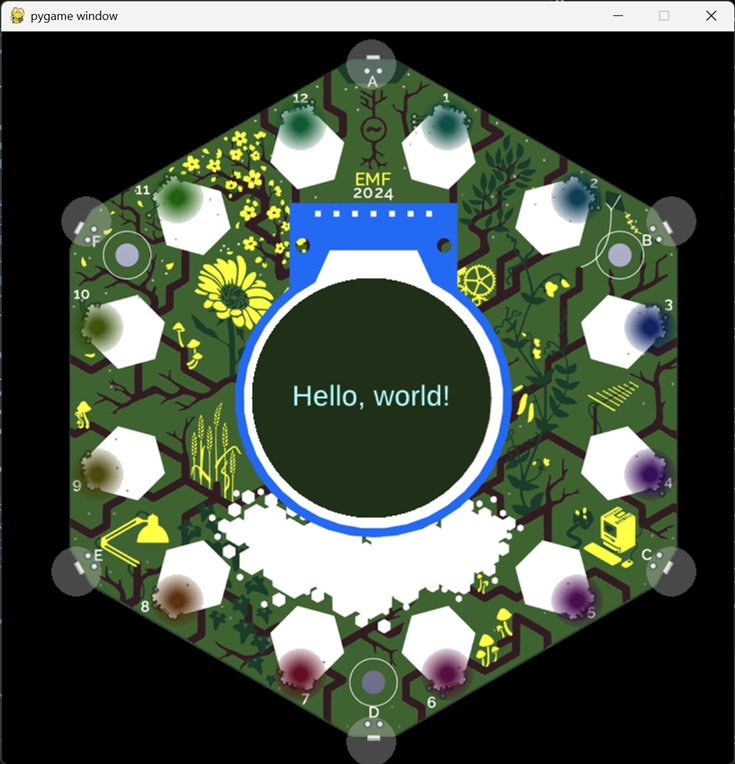
This is a small Tildagon app. The app imports the app base class, sets a button to allow you to cancel out of the app, and writes Hello, world! to the badge screen:
Run the app
To test the app, we recommend the local simulator.
If you need to access badge hardware, use mpremote to copy the app onto your real-life badge.
Once you're ready with development, you can publish it to the app store. After the app is published you can also use it in the web emulator.
If you have a real badge, deploy your app to it using mpremote.
Otherwise, install the local simulator on your computer and test it there. There is also a web emulator but as of 21st June 2026 it does not currently support running your own app.
Once you're ready, you can publish it to the app store.
The App class
To make a badge app in Python, you subclass the App class. When you subclass the App class to create your app, you need to overwrite some of its methods to make it do something useful.
Wondering what a subclass is or what overwrite means? Expand this!
In Python, you can create classes that have properties and methods. A simple class might be a Shape class that allows you to create shapes that store their color and each have a price of 5.
class Shape:
    def __init__ (self, color):
        self.color = color
        self.price = 5

    def get_color(self):
        return color

    def get_price(self):
        return price
The shape class does not allow you to store any more detail about the shape but you can use it to create subclasses, like a Rectangle which can store additional properties and provide more functionality, like area calculation:
class Rectangle:
    def __init__ (self, length, width, color):
        self.length = length
        self.width = width
        super().__init__(color)

    def get_area(self):
        return self.length * self.width
If you were to use these classes you could define shapes like this:
blue_shape = Shape("blue")
green_shape = Shape("green")
blue_rectangle = Rectangle(3, 4, "blue")
green_rectangle = Rectangle(2, 3, "green")
And you could call the methods on them:
print(blue_shape.get_color())
print(blue_shape.get_price())
print(green_shape.get_color())
print(green_shape.get_price())

print(blue_rectangle.get_color())
print(blue_rectangle.get_price())
print(blue_rectangle.get_area())
print(green_rectangle.get_color())
print(green_rectangle.get_price())
print(green_rectangle.get_area())
Because the Rectangle class is a subclass of Shape, you can also call the get_color() method on Rectangles. The Rectangle class inherits the methods and properties of the Shape class.
To follow this example further, let's imagine you want to create a DiscountRectangle class which subclasses the Rectangle class but returns a different price for some Rectangles that you want to sell at a 20% discount. To do that you can overwrite, that is change and replace, the get_price() method.
class DiscountRectangle:
    def __init__ (self, discount, length, width, color):
        self.discount = 0.8
        super().__init__(length, width, color)

    def get_price(self):
        return self.price * self.discount
Now when you create a Rectangle and a DiscountRectangle and call the get_price() method on both, you get different prices! You have overwritten the method!
Usage
This section walks you through the most common usage first which is enough to build many apps.
Afterwards, you'll learn how to update state while an app is minimized, how to draw multiple objects, and how to add asynchronous functionality.
If you would like to dive straight in, follow this tutorial to build a snake app.
Common Usage
You can think of the apps on your badge as objects with update() and draw() methods.
- To be able to subclass the
Appclass, import theapppackage at the top of your Python file:
- Next define your class:
-
When subclassing the
Appclass you need to choose which methods to overwrite. Most apps will overwrite at least the__init__(),update(), anddraw()methods: -
The
__init__()method allows you to store information about your app. For example, you might have a counter for when the right button is pressed. - The
update()is called every 0.05 seconds. It's there to allow you to update state. For example, to make an app that counts up when the right button is pressed, you would want to check whether the right button is pressed and if it is, increase the counter. Note that in this example the counter will count up while the button is pressed every time this method is called so the counter will increase every 0.05 seconds instead of only once when you initially press the button! - The
draw()method is also called roughly every 0.05 seconds and is there to update what is visible on the screen using thectxlibrary. More on this library later. In the example below, we overwrite thedrawmethod so that it draws a big light-green rectangle that functions as the background, and then it puts the counter as text on the screen.
Here's a minimal example which shows a counter that counts up when the right button is pressed. The counter is stored as a property on the app and increased in the update() method if the button is presses/held. The draw() method reads the current value every 0.05 seconds and updates what's on the display:
import app

from events.input import Buttons, BUTTON_TYPES

class RightButtonCounterApp(app.App):
    def __init__(self):
        self.button_states = Buttons(self)
        self.counter = 0

    def update(self, delta):
        if self.button_states.get(BUTTON_TYPES["RIGHT"]):
            self.counter = self.counter + 1

    def draw(self, ctx):
        ctx.rgb(0, 0.2, 0).rectangle(-120, -120, 240, 240).fill()
        ctx.rgb(0, 1, 0).move_to(-80, 0).text(str(self.counter))

__app_export__ = RightButtonCounterApp
If you want to instead count a button press once, you can do that by clearing the button_state after the first time it's counted:
import app

from events.input import Buttons, BUTTON_TYPES

class RightButtonCounterApp(app.App):
    def __init__(self):
        self.button_states = Buttons(self)
        self.counter = 0

    def update(self, delta):
        if self.button_states.get(BUTTON_TYPES["RIGHT"]):
            self.button_states.clear()
            self.counter = self.counter + 1

    def draw(self, ctx):
        ctx.rgb(0, 0.2, 0).rectangle(-120, -120, 240, 240).fill()
        ctx.rgb(0, 1, 0).move_to(-80, 0).text(str(self.counter))

__app_export__ = RightButtonCounterApp
- Currently, the
RightButtonCounterAppfrom step 3 does not allow you to leave the app. To remedy that, we should add functionality to the overwrittenupdate()method to call theApp'sminimise()method when the cancel button is pressed. You should always provide a way to get out of an app!
import app

from events.input import Buttons, BUTTON_TYPES

class RightButtonCounterApp(app.App):
    def __init__(self):
        self.button_states = Buttons(self)
        self.counter = 0

    def update(self, delta):
        if self.button_states.get(BUTTON_TYPES["CANCEL"]):
            # The button_states do not update while you are in the background.
            # Calling clear() ensures the next time you open the app, it stays open.
            # Without it the app would close again immediately.
            self.button_states.clear()
            self.minimise()
        if self.button_states.get(BUTTON_TYPES["RIGHT"]):
            self.button_states.clear()
            self.counter = self.counter + 1

    def draw(self, ctx):
        ctx.rgb(0, 0.2, 0).rectangle(-120, -120, 240, 240).fill()
        ctx.rgb(0, 1, 0).move_to(-80, 0).text(str(self.counter))

__app_export__ = RightButtonCounterApp
With these methods you can create many apps. There are a few more available that will allow you to do a bit more. We'll go over two that allow you to perform background updates and draw overlays next.
Update app state while minimised
You've just encountered the update() method which allows you to update state, that means properties of your app. The update() method gets called while your app is open in the foreground. The background_update() method allows you to perform updates while the app is in the foreground and while it is minimised (after a user performed an action that called the minimise() method).
Note that you cannot get information about buttons or button presses while your app is in the background. Therefore the following example shows you a counter that simply counts up while your app is in the foreground or in the background. If you test this app you will see the counter increasing while you are in the app and if you leave the app and go back to the app it will have continue to increase while you were gone!
import app

from events.input import Buttons, BUTTON_TYPES


class TimeCounterApp(app.App):
    def __init__(self):
        self.button_states = Buttons(self)
        self.counter = 0

    def update(self, delta):
        if self.button_states.get(BUTTON_TYPES["CANCEL"]):
            self.button_states.clear()
            self.minimise()

    def background_update(self):
        # if self.button_states.get(BUTTON_TYPES["RIGHT"]):
        self.counter = self.counter + 1

    def draw(self, ctx):
        ctx.rgb(0, 0.2, 0).rectangle(-120, -120, 240, 240).fill()
        ctx.rgb(0, 1, 0).move_to(-80, 0).text(str(self.counter))


__app_export__ = TimeCounterApp
By default, the background_task() method is automatically run by the scheduler, regardless of whether the app is in the foreground or background, and calls background_update() every 0.05 seconds. You can overwrite this method to change the frequency at which you perform tasks or call the background_update() method.
Draw multiple objects
The draw_overlays() method allows you to draw multiple objects that are stored in the self.overlays property. To make use of the inbuilt functionality of the draw_overlays() method, add all objects that you want to draw and that have a draw() method to the self.overlays property.
The following example defines a Rectangle class. When instantiated, that is when a new Rectangle object is created, the rectangle is assigned a random color. Each Rectangle object has a draw() method associated with it, which means that you can add Rectangle objects to the self.overlays array and they will automatically be drawn.
The OverlaysApp creates an app that add a new Rectangle object as an overlay when you press the right button, and removes the last added rectangle when you press the left button:
import app
import random

from app_components import clear_background
from events.input import Buttons, BUTTON_TYPES


class Rectangle(object):
    def __init__(self):
        self.r = random.random()
        self.g = random.random()
        self.b = random.random()

    def draw(self, ctx):
        ctx.rgb(self.r, self.g, self.b).rectangle(-60, -60, 120, 120).fill()


class OverlaysApp(app.App):
    def __init__(self):
        self.button_states = Buttons(self)
        super().__init__()
        print(self.overlays)

    def update(self, delta):
        if self.button_states.get(BUTTON_TYPES["CANCEL"]):
            self.button_states.clear()
            self.minimise()
        if self.button_states.get(BUTTON_TYPES["RIGHT"]):
            self.button_states.clear()
            # Add an overlay rectangle
            self.overlays.append(Rectangle())
        if self.button_states.get(BUTTON_TYPES["LEFT"]):
            self.button_states.clear()
            # Remove an overlay rectangle
            self.overlays.pop()

    def draw(self, ctx):
        # You don't technically need to overwrite the draw method but if you
        # do not, then the menu remains visible when the app is opened.
        clear_background(ctx)
        self.draw_overlays(ctx)


__app_export__ = OverlaysApp
Asynchronous functionality
The last two available methods allow you to add functionality with asynchronous methods.
Wondering what an asynchronous method is? Expand this!
Read more about this at geeksforgeeks.
The run() method allows you to call asynchronous methods, enabling you to wait for user input, for example with the Dialog ui element.
The following example app, overwrites the run() method to prompt the user every 2 seconds whether they want to change the color displayed on the screen and then waits for user input:
import asyncio
import app
import display
import random

from app_components.dialog import YesNoDialog


class BasicApp(app.App):
    def __init__(self):
        super().__init__()
        self.color = (1, 0, 0)

    async def run(self, render_update):
        # Render initial state
        await render_update()

        while True:
            await asyncio.sleep(2)

            # Create a yes/no dialogue, add it to the overlays
            dialog = YesNoDialog("Change the colour?", self)
            self.overlays = [dialog]
            # Wait for an answer from the dialogue, and if it was yes,
            # randomise colour
            if await dialog.run(render_update):
                self.color = (
                    random.random(), random.random(), random.random())

            # Remove the dialogue and re-render
            self.overlays = []
            await render_update()

    def draw(self, ctx):
        ctx.save()
        ctx.rgb(0, 0, 0).rectangle(-120, -120, 240, 240).fill()
        ctx.rgb(*self.color)
        display.hexagon(ctx, 0, 0, 80)
        ctx.restore()

        self.draw_overlays(ctx)


__app_export__ = BasicApp
Properties
| Property | Type | Description |
|---|---|---|
overlays | An array of objects that each have a draw method. | Your app's list of overlays. |
Methods
You can use the following methods on an App object:
| Method | Description | Arguments | Returns |
|---|---|---|---|
__init__() | Initializes the app. You can overwrite this method to add additional properties or perform tasks. | None | None |
run(render_update) | Asynchronous. By default, the run() method calls render_update repeatedly. You can overwrite the run() method which allows you to call asynchronous methods, enabling you, for example, to wait for user input with the YesNoDialog ui element. If you do overwrite this method, you can use the original implementation for reference. | render_update: The method that triggers a draw() call when updates are complete. | None |
update(delta) | By default, This method is called by the run() method every 0.05 seconds. By default, it has no implementation. You can overwrite this method to perform updates. | delta: Time difference between the last update call and the current update call. | None |
draw(ctx) | By default, this method calls draw_operlays(). To add UI elements or other visual elements to your app, you need to overwrite this method. | ctx: The canvas that let's you add graphics or texts. See ctx library. | None |
draw_overlays(ctx) | Draw each overlay stored in self.overlays on the screen. If you overwrite your draw() method and have any overlays, you need to call this method manually. | ctx: The canvas that let's you add graphics or texts. See ctx library. | None |
background_task() | Asynchronous. A loop for all applications, regardless of focused status. By default, it will call background_update() every 0.05 seconds. You can overwrite this behaviour. If you do, you can use the original implementation for reference. | None | None |
background_update(delta) | This method is called by background_task() every 0.05 seconds. By default, it has no implementation. You can overwrite this method to perform updates in the background, that means even if your app is not in the foreground. | delta: Time difference between the last update call and the current update call. | None |
minimise() | Minimise the app (it still runs in the background). | None | None |
terminate(restore_pattern) | Terminates the app. This method available in Tildagon OS v2.0.0 or newer. | restore_pattern: Whether to restore the LED pattern back to the user's preference, defaults to False. | None |
Creating User Interfaces
Premade elements
You can use the following premade app_components to create user interfaces:
Menu: scroll up/down and selectNotification: pop up notificationsYesNoDialog: create yes or no dialoguesTextDialog: create text dialoguesLayout: create menu layouts like the settings appTokens:- constants for the display properties and colors
- functions for clearing the background and setting a color
The ctx library
You can also create your own user interfaces using the ctx graphics library.
Use mpremote to test an app on your badge
You can test your app on-device, without publishing it, see the instructions to run your app on your badge.